If you have already begun entering data for your tournament or have previously imported data from the website, then this step will describe the process of importing the data into your existing tournament.
The main difference here is that there is a little bit of 'matching up' that needs to be done in order for this process to work correctly. This 'matching up' process is called 'mapping' in this document.
There are two different things that will need to be 'mapped'. First, any existing events will need to be mapped to those on the website. If you have entered the events into The Joy of Tournaments, you will need to make sure that the event mapping is correct. For example, if you host US Extemp, the website may refer to that event as Domestic Extemp. These two events are actually the same event, but they have different names. The 'mapping' process allows you to specify which event that you have on your PC maps to which event on the website. Many times, this process will be done for you. After you map your events once, the software will remember your mappings for each subsequent imports.
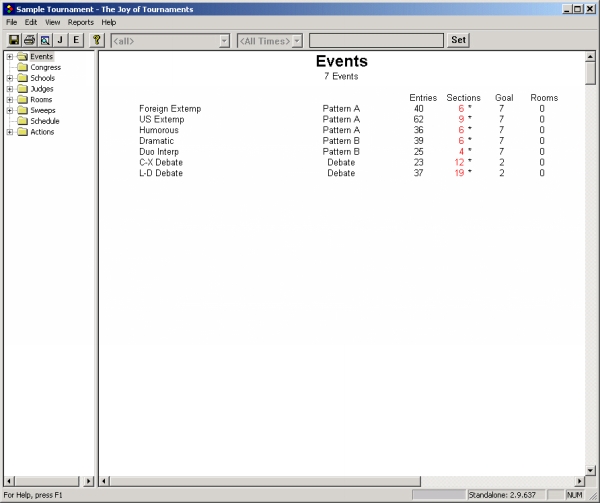
There are a number of ways that your tournament may appear when you begin the import process. For this example, we will start with a tournament that has already imported the entries one time. Some of the schools have already been imported and some have not.
From the File menu, select the option labeled Import Website Entries. The following dialog will appear.
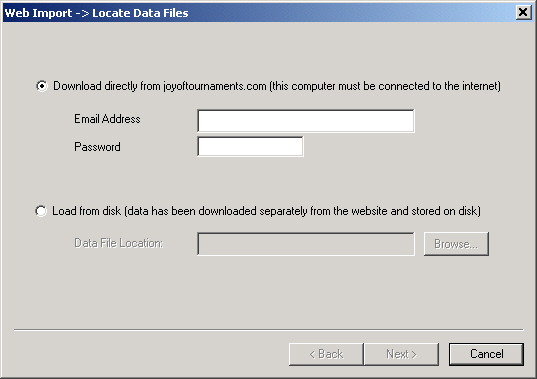
From this dialog, you will select the option to download directly from the website or the option to load from disk. Once you specify the appropriate option, you will be able to press the button labeled Next. You should see the 'Map Events' dialog appear as follows:
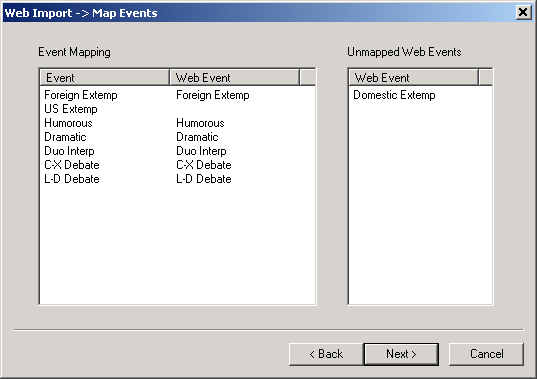
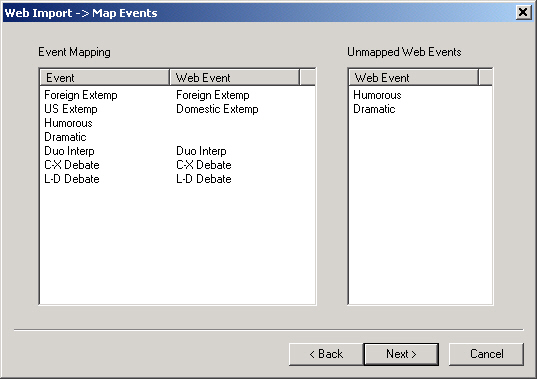
This dialog has two lists. On the left is a list labeled Event Mapping. The event mapping has two columns. The left column is labeled 'Event' and the right column is labeled 'Web Event'. The list on the left displays the current mapping. The left-most column displays the name of the event on your PC. The column labeled 'Web Event' displays the corresponding name of the event from the website. In the example above, you see that the 'US Extemp' event has no corresponding web event.
The list on the right is labeled Unmapped Events. If there are any events that are not 'mapped' to an existing event on your PC, they will appear in this list.
To provide a 'mapping' for the Domestic Extemp event in this example, you would double-click the 'Domestic Extemp' event in the right-hand list. Next you would see a dialog allowing you to select an appropriate event.

You have essentially two options from this dialog. You can either select the name of an existing event already on your PC, or you can select the <new event> option. If you select the New Event option, then a new event will be created and all of the entries from the website will be linked to the new event. For our example, you would select 'US Extemp' to indicate that the website event named 'Domestic Extemp' is really the same as the PC event called 'US Extemp'.
You will need to be sure that the event mapping that you provide is correct. It is entirely possible to map the events incorrectly. If you do so, once the entries are imported to the PC, you will have students entered in the wrong events. If this happens, you may always re-import and make the appropriate corrections.
For example, notice in the following example that the mapping for Humorous and Dramatic are both incorrect.

To make a correction to the mapping, double-click on the name of the event in the left-hand list that is incorrect. In this example, you would double-click on both Humorous and Dramatic in the 'Event' column on the left. When you double-click on an event, it will move to the 'Unmapped' list on the right.
From this point, you could then double-click on the events in the 'Unmapped' list and provide the correct mapping as we did above for the 'US Extemp' event.
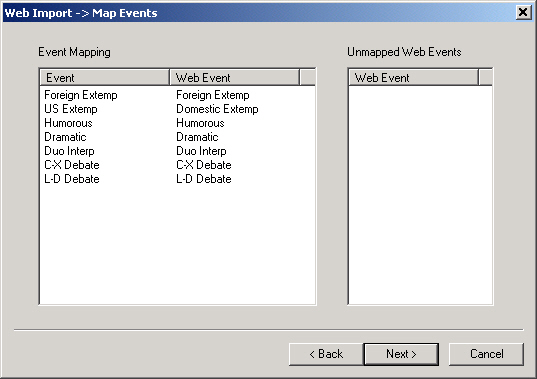
You will want to map events until the 'Unmapped Events' list is empty before continuing to the next step. If you try to go on while website events remain unmapped, you will get a warning message.
Once you have all of the events mapped correctly, you are ready to press the button labeled Next. You should see the 'Map Schools' dialog appear similar to the following:
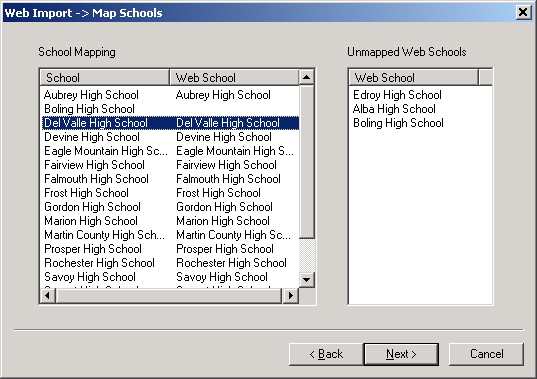
This dialog works similar to the previous dialog. Two lists are displayed. The list on the left is labeled School Mapping. The left column of this list is labeled 'School' and the right column is labeled 'Web School'.
The list on the right is labeled Unmapped Schools. Typically the schools that will appear in this list are those that have registered since the last time that you imported entries from the website.
To specify a mapping for an 'unmapped' school, double-click on the school name. From the dialog that appears, specify the appropriate mapping.
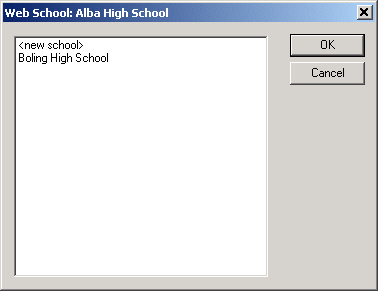
Double-clicking on a school in the left-hand list will move it to the 'Unmapped' list on the right. Double-clicking on a school in the right-hand list will allow you to specify a mapping for the school.
Once you have mapped all of the schools, press the button labeled Next. This will bring up the final step of the import process.
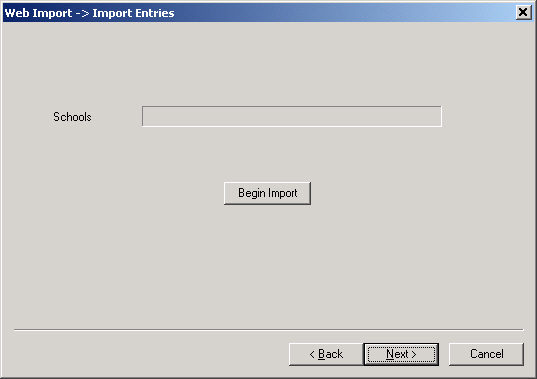
When you press the button labeled Begin Import, the process of reading the information stored in the files received from the website will begin. The progress bar on this dialog will indicate how far along you are in the process. As each school is imported, the school name will appear beneath the progress bar.
When you import into an existing tournament, several steps occur:
When this process completes, you may press the button labeled Finish that will appear. All of the schools, entries, and judges that were recorded on the website will then be available on your PC. For example, if you will compare the following screenshot to the first one on this page, you will see that several more entries have been recorded after the import.
